One of the most common questions we get at The Air Shop is: can I really install a monoblock AC unit myself? The honest answer is yes - and this guide will walk you through exactly how.
Monoblock installation is one of the most straightforward home improvements you can do. If you've ever put up a shelf, assembled flat-pack furniture, or used a drill, you have the skills. Most first-time installers complete the job in 2 - 4 hours.
Here's everything you need to know.
What you'll need before you start
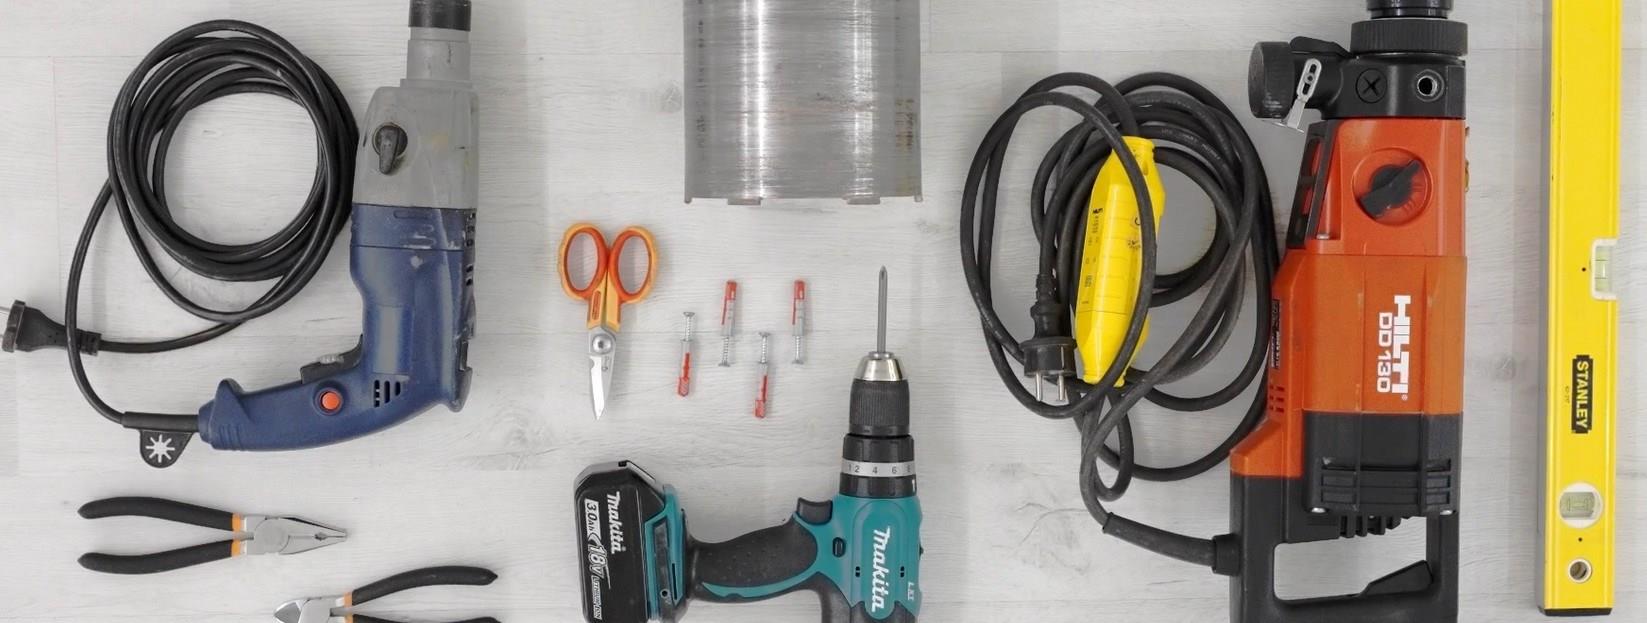
Tools:
- Core drill with 120mm –150mm bit (exact size depends on your unit's duct diameter - check your manual)
- Spirit level
- Tape measure
- Pencil or chalk for marking
- Masking tape
- Dust sheets
- Screwdriver (typically Phillips head)
- Wall plugs and screws appropriate for your wall type
- Sealant gun with external-grade silicone sealant
From your unit box:
- The AC unit itself
- Wall sleeve / duct sleeve (usually included)
- External grille / louvre (usually included)
- Wall bracket or mounting hardware
- Remote control and batteries
- Installation manual
Other:
- A standard 240V 13A socket within reach of the unit's power cable (typically 1.5–2 metres)
- A helper is useful but not essential
Step 1 - Choose the right location
This is the most important decision before you pick up a drill.
The unit needs to sit against an external wall - one that leads directly outside, not into another room. The duct will pass through this wall to vent heat outside.
Choose a location that:
- Is on an external wall with enough thickness to accommodate the sleeve (standard UK cavity walls are fine)
- Allows the unit to sit at the manufacturer's recommended height (usually 10–20 cm from the floor for floor-standing units, or at head height for wall-mounted models - check your manual)
- Has a 240V socket within cable reach, or where one can be added by an electrician
- Avoids positioning directly in sunlight if possible - a unit in direct sun works harder
- Has reasonable clearance around the air intake and outlet - check your manual for minimum distances
Outside, check where the duct and external grille will exit. Avoid positioning above a neighbour's window, directly above a path where the warm exhaust will blow on people, or in an area that's permanently sheltered and traps heat. The unit exhausts warm air outside - give it space to disperse.

Step 2 - Mark and prepare the wall
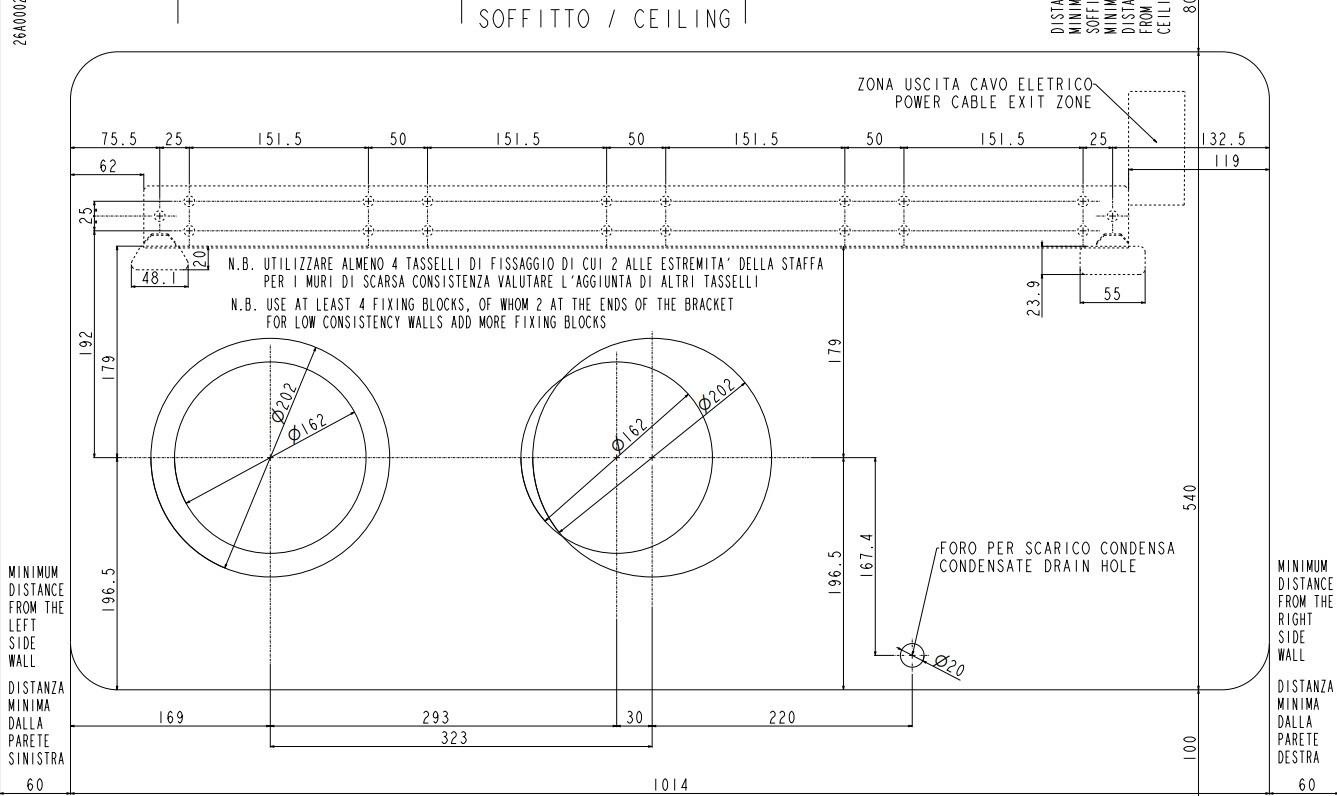
Hold the wall sleeve or use the template provided in your manual to mark the centre point of your core hole on the internal wall. Use a spirit level to ensure it's correctly positioned relative to the unit's duct outlet.
Double-check by holding the unit in position - either by yourself or with a helper. Confirm the duct outlet on the unit aligns with your marked centre point.
Once you're happy, mark clearly with pencil. Apply masking tape around the marked area on both sides of the wall - this protects the wall finish and reduces cracking around the edge of the hole.
Step 3 - Core drill through the wall
This is the step that sounds intimidating but is straightforward with the right bit.
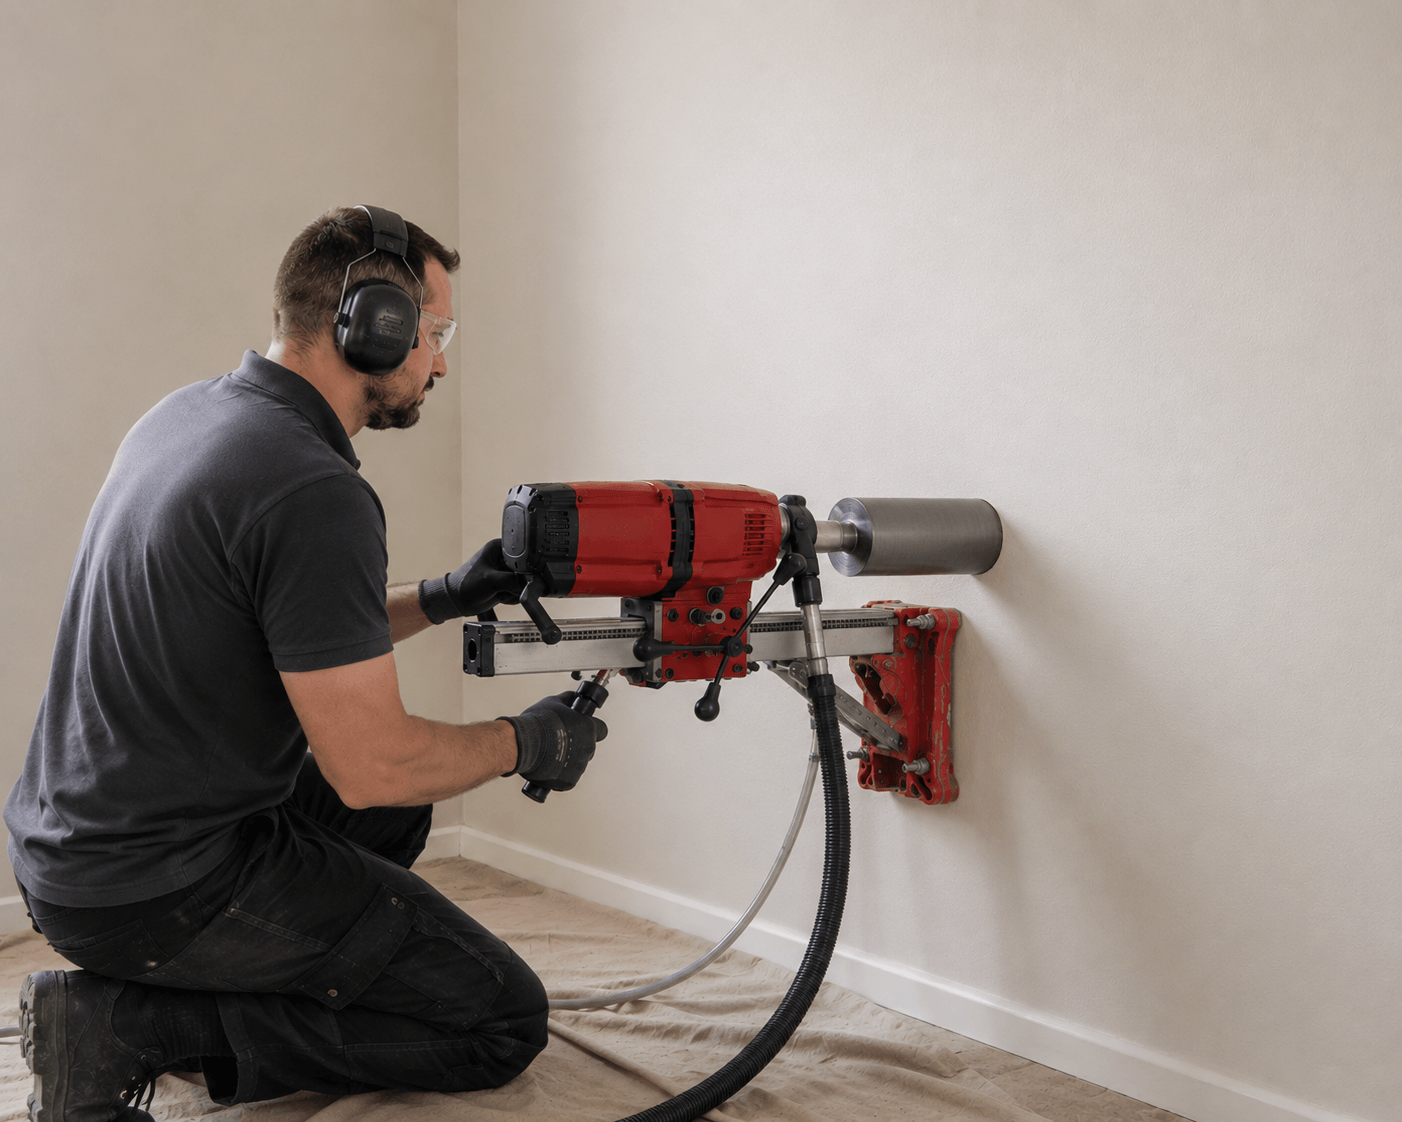
Fit the correct diameter core drill bit to your drill. Check your installation manual for the exact duct diameter - typically 120mm–150mm. If you don't own a core drill, they're available to hire from most tool hire companies for around £30–50 per day.
Drill slowly and steadily from the inside. Keep the drill level - use a spirit level taped to the drill body if needed. For cavity walls, you'll pass through the inner leaf, a gap, and the outer leaf. Take your time through the outer brick or block to avoid cracking the face.
Once through, tidy the edges of the hole with the drill on slow speed or by hand. Remove all debris from inside the hole.
Important: angle the hole very slightly downward toward the outside - approximately 3 - 5 degrees. This ensures any condensate drains outward rather than back into the room.
Step 4 - Fit the wall sleeve
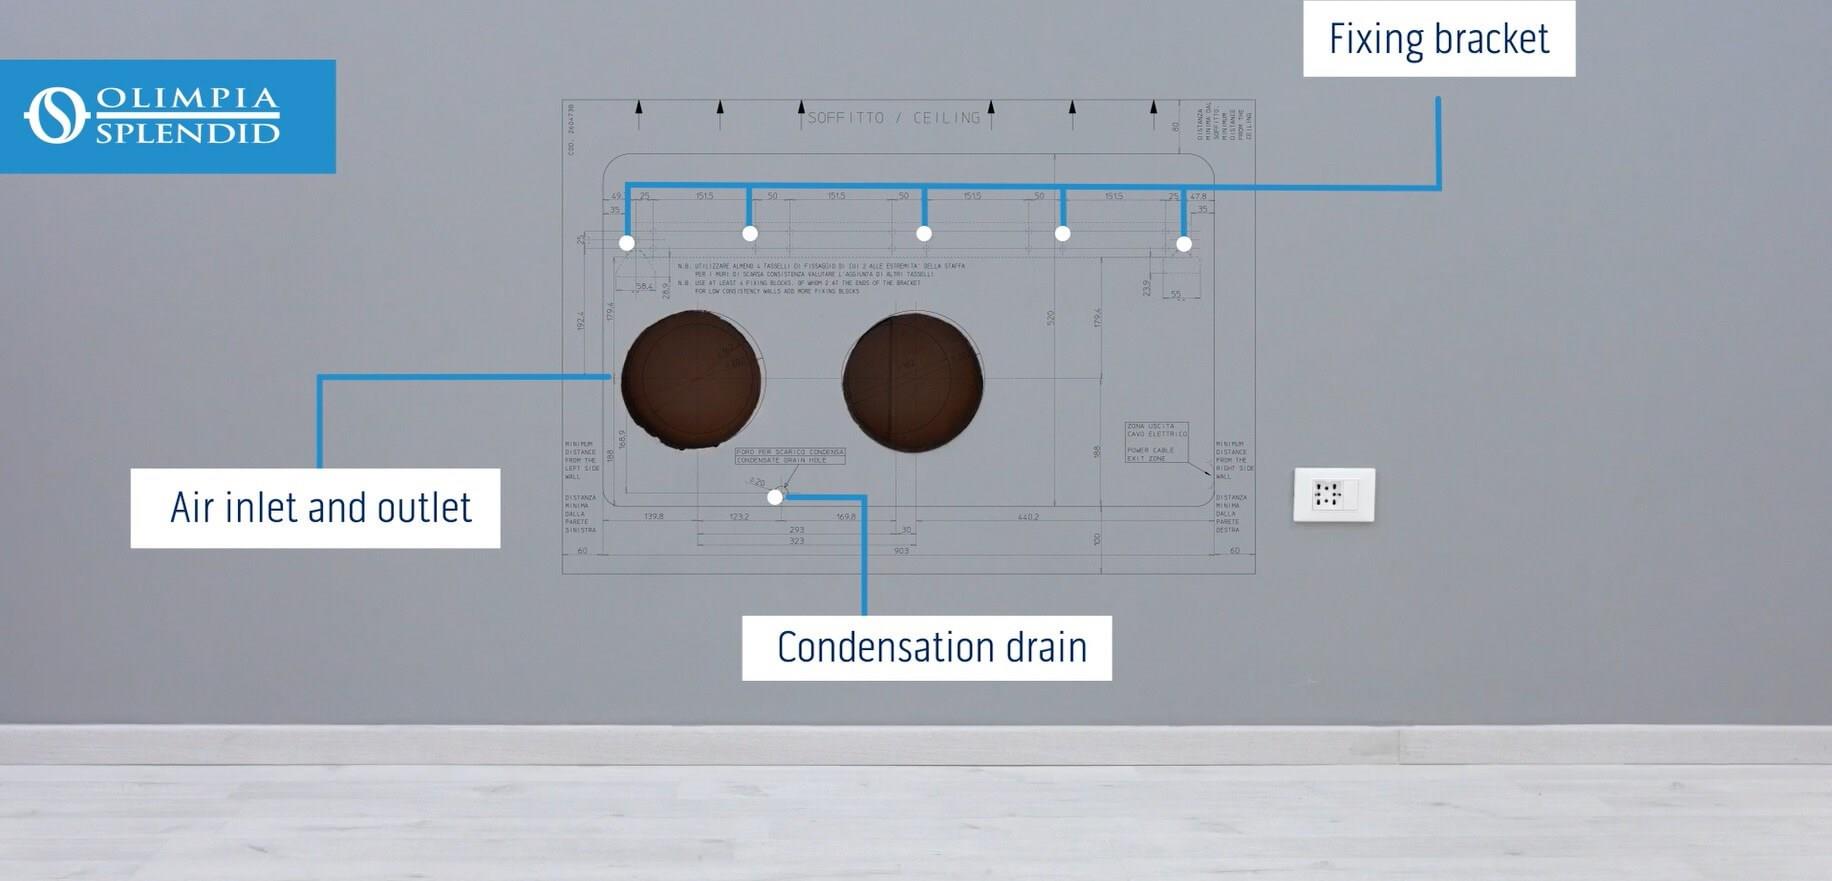
Slide the wall sleeve through the hole from the inside. The sleeve protects the edges of the hole, provides a clean finish, and guides the duct in and out neatly.
Most sleeves are adjustable in length to suit different wall thicknesses. Set the length before inserting - you want it to sit flush with the internal wall face and extend to just flush with the external face.
Fix the internal flange to the wall using the wall plugs and screws provided. Use a spirit level to confirm it hasn't twisted during fitting.
On the outside, fit the external grille or louvre cover over the sleeve exit. This prevents rain, insects, and debris entering when the unit isn't running. Fix securely and seal around the perimeter with external-grade silicone sealant. Run a neat bead around the entire external flange and smooth with a wet finger. This seal is important - it prevents water ingress and draughts.
Allow sealant to cure as per the manufacturer's instructions before running the unit (usually 2– 4 hours minimum).
Step 5 - Mount or position the unit
For wall-mounted monoblock units: fix the wall bracket to the internal wall according to the manufacturer's template, using appropriate fixings for your wall type (cavity wall anchors for stud walls, standard wall plugs for brick or block). Check the bracket is level before fixing fully. Hang the unit on the bracket and confirm it's secure.
For floor-standing monobloc units: position the unit against the wall with the duct outlet aligned with the sleeve. Most floor-standing units don't require wall fixing - check your manual.
Connect the unit's duct to the wall sleeve. Most ducts are flexible hose or semi-rigid pipe that clips or pushes into the sleeve. Ensure the connection is snug - a loose duct will allow warm air to leak back into the room.
Step 6 - Electrical connection
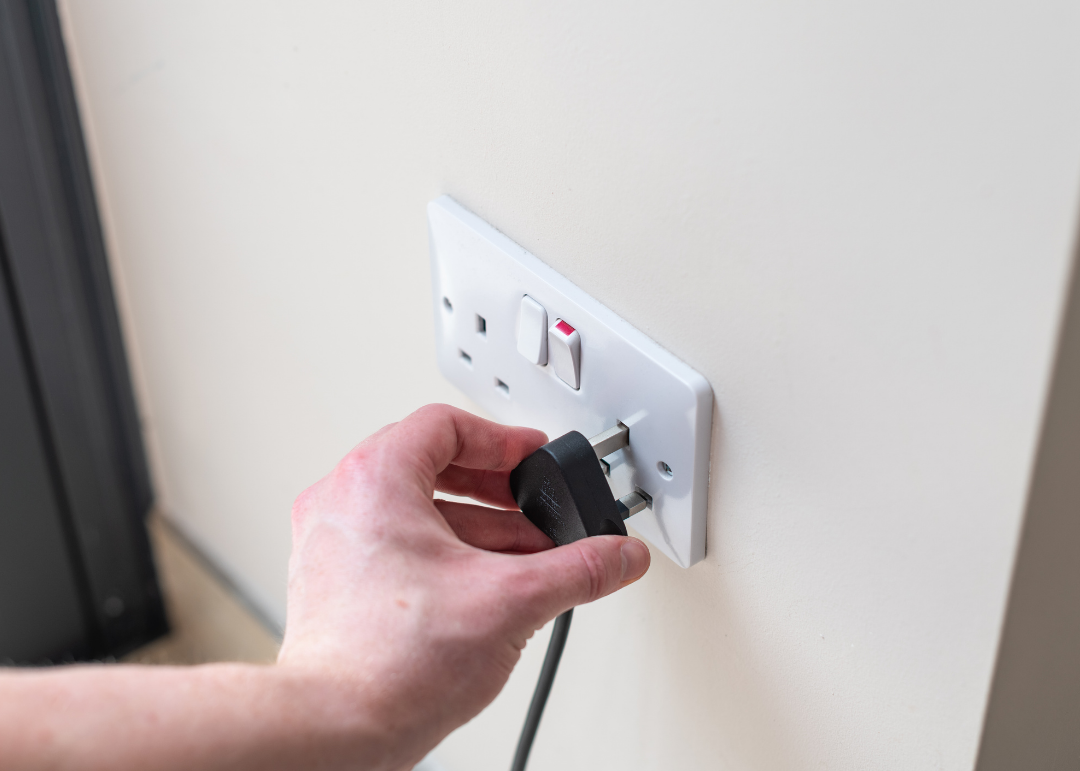
Plug the unit's power cable into the 240V socket. That's it.
Monobloc AC units run on a standard 13A socket - no specialist wiring, no isolator switch required for most domestic installations. If your nearest socket is too far away, use a correctly rated extension cable temporarily, but arrange a permanent socket to be added by an electrician for the long term.
Do not use a multi-socket extension block shared with other high-draw appliances.
Step 7 - First run and checks
Before switching on, run through this checklist:
- External sealant applied and cured
- Duct connected snugly to sleeve at both ends
- External grille fitted and fixed
- Unit level and secure (wall-mounted) or stable (floor-standing)
- Air intake and outlet unobstructed (check for packaging debris)
- Power cable connected to a socket that is switched on
Switch the unit on using the remote control. Select cooling mode and set the temperature to approximately 22°C. Within a few minutes you should feel cool air coming from the unit's outlet.
Go outside and check the external grille - you should feel warm air exhausting. If the grille feels cool or there's no airflow, check the duct connection inside.
Run the unit for 30 minutes on first use, then check:
- Unit is cooling effectively
- No unusual noises (a gentle hum and fan noise is normal; grinding or rattling is not)
- No condensate dripping inside the room
- Remote control functions all respond correctly
If all is well - you're done.
Common installation mistakes to avoid
Drilling the hole level rather than slightly angled down to the outside. This is the most common error. Even a flat hole will usually drain adequately, but a slight downward slope to the outside is best practice.
Skimping on the external sealant. A gap around the external grille allows water in and cold air out in winter. Use enough sealant and smooth it properly.
Positioning too close to a corner. The unit needs airflow around its intake. Fitting tight into a corner restricts this and reduces efficiency.
Choosing the wrong size. A unit that's too small for the room will run constantly and never reach target temperature. Use our room sizing guide or call us before ordering.
Not reading your specific model's manual. This guide covers the general process - your model may have specific steps or requirements. Always read your manual alongside this guide.
When you might want professional help
This guide covers standard UK cavity and solid wall installations. You may want to get a professional involved if:
- Your wall is reinforced concrete or contains steel - specialist drilling equipment is needed
- You have a solid stone wall over 500mm thick
- You need a new electrical socket adding - this should be done by a qualified electrician
- You're in a listed building or conservation area and want to confirm permitted development applies
Other than these situations, the vast majority of UK homeowners can fit a monoblock unit confidently without any outside help.
Need help before you start?
Call us at The Air Shop before you buy or before you drill. We'd rather answer your questions upfront than have you hit a problem halfway through installation. We know our products inside out and we'll tell you honestly if something about your situation needs a different approach.
Shop monoblock AC units
Contact us
Download installation guide PDF
 Share
Back to Blog